FAQ - Plants - Directions for Planting Water Lilies

Water Lilies

When we collect lilies from our ponds, we look for the best specimen that we can find. We remove the plant from the pond, wash the soil off of the roots, remove old, large, and damaged leaves, old flowers, etc. This is as much for the sake of the plant’s health as it is for minimizing the shipping costs. It is good for the plant’s health because it is easier for the plant to produce new roots and leaves if it does not waste energy trying to save old leaves that it will ultimately drop anyway. No plant can support all of the leaves that it has at the time that it is collected because the roots have been damaged. We then put the plant into a damp newspaper lined plastic bag, which is put into a box. It is shipped with minimal moisture to avoid rotting and, again, to reduce the shipping weight.

When you receive your lily in the mail, carefully remove it from the box. Try to avoid breaking roots and leaves from the plant, although it should be noted that if the plant is planted properly, it will recover very quickly from the trauma of having been shipped, etc. Find a regular nurseryman’s pot. Pots that are deeper than wide should have holes in the bottom. Those that are shallow and wide, i.e., trays, need not have holes in the bottom. The reason for the holes is to allow the soil to breathe. If it can’t get to some oxygen, it will become anaerobic, which you do not want. Trays need no holes because the soil is able to breathe through its comparatively large surface area. Lilies will grow to a size that is directly proportional to the size of the pot, with a given soil mix.

A 1G pot will give a good plant for a month or two, after which supplemental feedings will be necessary. This is a good size for a small pond.
A 2G pot will produce a great plant for most of the summer. Anything larger will produce larger plants.
Ten gallon pots are good for a couple of seasons.
Trays are useful in shallow ponds. Kitty litter trays work well for small ponds and larger trays, of course, work well for larger ponds. The shortcomings of trays are that in ponds with koi or goldfish, the tray gives the fish more surface area to dig in than a regular pot does, and if the tray is particularly large, it is hard for one person to lift.

Cover any holes with a layer or two of newspaper. Do not bother to use shade cloth, window screen, parts of plastic bags, etc., newspaper works just fine. Add enough unamended soil to the bottom of the pot to reach slightly above the holes. On top of this, add amended soil. If the plant has long roots, try to involve them with the soil as it goes into the pot. This avoids lumps of roots that may rot before they grow. Also, it gets the roots out into the soil where the fertilizer is so that the fertilizer has less chance of leaching out into the pond water before the plant can get to it. If the plant has just been removed from a pond and has a large mass of roots, comb out all of the loose, unattached roots, leaving only those roots that are well attached to the tuber and that are healthy.

  • Place hardy lilies tubers so that they sit at about a 30 degree angle at the top of the soil with about 2/3 of the tuber in the soil, and the growing tip protruding slightly above the top of the soil.
  • Tropical lilies should be placed so that the bulb crown sits at or slightly below the top layers of the substrate.

If the pond has koi in it, stop the soil about 3” from the top of the pot, add a thin layer of sand (1/2”), then a thick layer of 1/2" to 1" crushed cinders. This flies in the face of some recommended planting methods. These would have you use granite gravel of some size or other. We do not like this because the gravel is too heavy, and the lilies are not particularly willing to grow through gravel. They don’t grow through it in nature, so we should not expect them to do so in our ponds. Also, larger stones tend to fall through the soil, leaving the lily as vulnerable to attack from the carp as they were without the stones. The good things about lava rock are that it is lightweight, it is inert, and it has numerous declevities on its surface, which gives the plant’s surface roots something to grab on to. This forms a tighter matrix on the soil surface than granite gravel will. And, last but not least, the roughness of the lava rock discourages fish from picking it up. If you have old lava rock from the filter or from the previous planting, use it. We always tamp the lava rock down to tighten it. On top of the lava rock, we add another layer of sand to seal the surface. If there are no koi present, sand alone will do the job. A 2” thick layer is fine.

Tamp the pot in the ground a couple of times. This squeezes most of the air out of the soil, which ensures that minimal soil will get blown out into the water as the air escapes into the water, and the pot is less likely to tip over in the first few moments after having been lowered into the pond. Merely lift the pot a few inches off of the ground and drop it. Lower it into the pond slowly to let the remaining air escape and you are done. If the plant is shorter than the water is deep, it will usually reach the surface within a couple of days.

Hardy lilies will grow in anything up to about 5’ of water, whereas most tropicals prefer water that is less than 30” deep.

potting soil for water plants
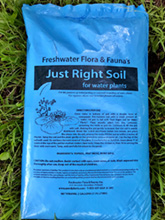
JRS Just Right Soil for Water Plants - 8 quart

For the purpose of initial potting or seasonal re-potting of Water Plants. For vigorous plants and beautiful flowers all season. This is our custom potting mixture, used by us in our business for over 35 years. Our plants won awards for Best Water Plants in a Landscape Contractor's Garden Display at the Del Mar Fair for over 20 years.

Be the first one to write a review $24.95 JRS10 Quantity:
2009_kit165.jpg
KITHL Complete Potting Kit - Hardy Waterlily

Complete lily planting kit for Hardy Waterlilies. Kit includes: hardy waterlily, pot, soil, fertilizer, sand and lava rock. Potting instructions available online. Everything you need to get a hardy waterlily potted and in your pond right away! The waterlily will be chosen from available stock so that your kit ships as soon as possible!

Be the first one to write a review $42.99 KITHL01 Quantity:
2009_kit165.jpg
KITML Complete Potting Kit - Dwarf Waterlily

Complete lily planting kit for Dwarf Waterlilies. Kit includes: dwarf waterlily, pot, soil, fertilizer, sand and lava rock. Potting instructions available online. Everything you need to get a dwarf waterlily potted and in your pond right away! The waterlily will be chosen from available stock so that your kit ships as soon as possible!

Be the first one to write a review $45.99 KITML01 Quantity:
2009_kit165.jpg
KITML Potting Kit - Lily or Sm. Bog

Complete planting kit for waterlilies or small bog plants. Kit includes: pot, soil, fertilizer, sand and lava rock. Potting instructions available online. Everything you need to get a waterlily or bog plant potted and in your pond right away! Note: NO PLANT is included with this kit. This kit is meant to be purchased separately.

Be the first one to write a review $30.00 KITML04 Quantity:
2009_kit165.jpg
KITTL Complete Potting Kit - Tropical Waterlily

Complete lily planting kit for Tropical Waterlilies. Kit includes: tropical waterlily, pot, soil, fertilizer, sand and lava rock. Potting instructions available online. Everything you need to get a tropical waterlily potted and in your pond right away! The waterlily will be chosen from available stock so that your kit ships as soon as possible!

Be the first one to write a review $44.99 KITTL01 Quantity:

Share on Facebook

Your Account Gift Certificate

cc_120.png

Bookmark and Share

FAQ - Plants - Directions for Planting Water Lilies

Pondplants.com -